


Which Skin Care Treatment Is Right for You? A Mom’s Guide to Peels, Microneedling, and Lasers
If you are a busy mom weighing med spa options, choosing the right skin care treatment can feel overwhelming. This clear, practical guide compares chemical peels, microneedling, and lasers so you can match results, downtime, cost, and safety to your skin concerns and schedule. Expect evidence based tradeoffs, a provider checklist, and realistic aftercare and maintenance plans you can use when booking consults.
Quick decision snapshot: which treatment fits your top priorities
Start with your single biggest goal. Pick the treatment that directly targets that priority rather than chasing whatever procedure is trending at the moment.
Decision-by-priority quick guide
- Minimal downtime, immediate glow: superficial chemical peels or Clear + Brilliant – modest, repeatable improvement in tone and texture; low downtime and lowest cost per session. See practical peel options at Chemical Peels.
- Acne scarring and texture: microneedling or radiofrequency microneedling (Morpheus8) – meaningful collagen remodeling over a series; moderate short downtime and progressive results after multiple sessions.
- Persistent hyperpigmentation or melasma: prioritize medical topicals and conservative superficial peels; avoid aggressive ablative lasers unless cleared by a dermatologist and after preconditioning.
- Deep wrinkles and severe sun damage: ablative CO2 resurfacing (Lumenis UltraPulse) – highest efficacy but significant downtime and recovery needs; usually a single dramatic session or staged treatment.
- Pore reducing / mild tightening: non-ablative fractional lasers or RF microneedling – balance between downtime and visible lift without full resurfacing.
Practical tradeoff to accept: faster, stronger results almost always equal longer recovery and higher complication risk. For busy moms that often means choosing the safest effective intensity and scheduling a staged plan rather than one aggressive procedure.
Real-world example: A 38-year-old mom with Fitzpatrick IV skin, rolling acne scars, and limited childcare picked a series of four SkinPen microneedling sessions with topical brightening preconditioning. The clinic planned treatments 4 weeks apart, avoided ablative lasers because of PIH risk, and bundled post-care supplies to minimize return visits.
What people get wrong: many assume lasers are the universal fix. In practice lasers are powerful tools when matched to the problem and skin type; they are not inherently better than peels or microneedling for every concern and are the wrong first move for melasma or darker skin without specialist oversight. For safety and results, matching mechanism to priority matters more than chasing maximum intensity.
Key takeaway: identify one clear outcome – tone, texture, pigment, or deep wrinkle reduction – then pick the lowest-intensity treatment that reliably moves the needle toward that goal.
Chemical peels: types, indications, and what moms should expect
Straight answer: chemical peels are the fastest med spa tool for predictable surface refreshment — better tone, faded superficial pigment, and milder lines — but effectiveness and risk change sharply with depth. Superficial peels are a low-disruption option for busy schedules; medium and deep peels increase results and downtime and require much stricter medical oversight.
Types and what they actually do
- Superficial (AHA/BHA): glycolic, lactic, salicylic — removes the outermost layers, quick recovery, repeatable. Good for mild sun damage, dullness, and acne-prone skin.
- Medium (TCA variations and branded peels): TCA in controlled strengths or products like The Perfect Peel, VI Peel, Obagi Blue Peel — penetrates into the upper dermis; treats thicker sun spots and fine lines but causes 5–10 days of peeling and requires pre/post medical care.
- Deep (phenol): single-session, very strong resurfacing that can deliver dramatic wrinkle reduction but carries cardiac, scarring, and long recovery risks and belongs in a surgical or dermatologic setting, not a casual med spa.
Key clinical point: depth equals both result and risk. A busy mom who needs visible improvement with minimal clinic time will usually get better real-world value from a series of superficial peels than from one medium peel that produces complications or long recovery she cannot manage.
Candidate considerations: peels work best when the complaint is epidermal — surface pigment, texture, dullness, mild acne. Melasma and hormonal pigment require conservative approaches: topical preconditioning (commonly 4–6 weeks) and test spots before any medium or deeper peel. For Fitzpatrick IV–VI, serial light peels with careful preconditioning are safer than one aggressive procedure.
Concrete example: a 36-year-old mom with new sunspots and early hormonal darkening chose a series of four 30% lactic acid peels spaced every three weeks plus daily azelaic acid while breastfeeding-safe topical decisions were confirmed with her clinician. The plan prioritized short recovery (a few days per session), gradual brightening, and built-in maintenance — avoiding medium TCA until lactation finished and a test spot confirmed low PIH risk.
Practical trade-off most people miss: clinics often upsell a single aggressive peel as a shortcut. In practice, steady, staged superficial treatments plus strict sunscreen and topical maintenance deliver comparable patient satisfaction with fewer setbacks for mothers who cannot bedrest or risk visible complications.
Next consideration: if your priority is deeper collagen remodeling rather than surface tone, read the microneedling section — peels are excellent for epidermal issues but limited for deep scarring or laxity.
Microneedling and radiofrequency microneedling: practical guide
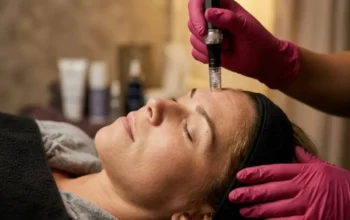
Straight to the point: microneedling remodels collagen by controlled micro injury; adding radiofrequency delivers targeted heat to the deep dermis for tightening. Which path you choose should depend on the texture problem, how deep the damage is, and how tolerant you are of cost and discomfort.
How microneedling works and why needle depth matters
Mechanics matter. Short needles primarily improve product absorption and superficial smoothness; medium-length needles stimulate dermal remodeling for enlarged pores and shallow scarring; longest needles are what change deep rolling or boxcar scars because they reach the mid to deep dermis. The device type – automated pen versus stamping roller – affects consistency and safety. Automated pens give controlled depth per pass and are the safer, more reproducible choice in most clinics.
Practical limitation: needle penetration is not a substitute for correct energy or biologic support. People expect one session to erase scars. In reality, meaningful texture change requires multiple thoughtfully spaced sessions, consistent sun protection, and maintenance topicals. Operator technique – depth choices, number of passes, and sterile handling – influences results more than the device logo on the wall.
Radiofrequency plus needles – what changes and what does not
RF adds thermal remodeling. The needles place energy below the surface, producing contraction and collagen tightening that plain needling cannot achieve. That makes RF microneedling better suited for mild skin laxity, jawline refining, and deeper scarring patterns. The tradeoff is higher cost, longer discomfort, and sometimes a longer visible recovery window.
- When to pick mechanical microneedling: primarily texture, enlarged pores, and to increase topical uptake when you want low-technology risk and lower cost.
- When to pick RF microneedling: early laxity, deeper scar remodeling, and when you need some tightening effect without full laser resurfacing.
- What to avoid: active cystic acne, open wounds, recent isotretinoin use without clinician signoff, and unverified biologic add-ons applied in non-sterile conditions.
Concrete example: A 42 year old mom with shallow boxcar scars and mild jawline sag chose RF microneedling to address both texture and laxity. Her provider mapped needle depth across zones, used topical numbing, and planned staged treatments with a conservative energy ramp to minimize pigment risk. She prioritized one device session that combined tightening with collagen stimulation rather than separate laser resurfacing and filler.
Important: PRP and serums can boost results but also increase infection and inflammation risk when applied during needling if sterility and product choice are poor. Insist on sterile technique and ask what is being introduced into the skin.
Bottom line: if your issue is surface texture and minimal downtime, mechanical microneedling delivers the best risk to reward in most mom schedules. For combined tightening and deeper scar work, RF microneedling is justified if you accept higher cost and a slightly longer recovery and choose a skilled operator who documents settings and demonstrates results on similar skin tones.
Laser options explained: non ablative fractional, ablative CO2, and picosecond devices
Plain fact: lasers are not interchangeable — each class solves different problems and carries distinct recovery and pigment risks that matter for busy moms.
How these lasers behave in practice
Non ablative fractional: devices like Fraxel Dual create microscopic zones of thermal injury while leaving the surface largely intact, producing steady improvement in texture and mild wrinkle softening with moderate redness and 3 to 7 days of social downtime. Best for areas that need resurfacing without a long recovery window. Ask whether the machine is fractional non ablative versus a lighter diode or IPL during consults.
Ablative fractional CO2: systems such as Lumenis UltraPulse vaporize columns of tissue and produce the deepest, longest lasting resurfacing. Results for deep creases and severe sun damage are dramatic, but expect a week or more of open healing, strict wound care, and a higher chance of scarring or pigment change if the operator is inexperienced. This is a medical procedure that often requires physician oversight and preplanning for childcare and time off.
Picosecond (pico) devices: machines like PicoSure work by photomechanical disruption of pigment and ink rather than thermal coagulation. They are efficient for stubborn brown spots and tattoo removal and can spare surrounding tissue, often translating to shorter visible recovery for pigment work. Picosecond treatments are not a universal anti aging fix; they shine on discrete pigment issues rather than global resurfacing.
- Key tradeoff to accept: higher tissue removal equals bigger effect but more complex aftercare and higher pigment risk, especially for Fitzpatrick IV to VI.
- Practical limitation: aggressive CO2 is worthwhile only when deep dermal change is required and the patient can commit to 7 to 14 days of wound care; otherwise staged non ablative or combined approaches often give better real world satisfaction.
- Common misread: pico is frequently marketed as safe for all skin tones. In practice it can still trigger PIH on darker skin and often requires test spots and topical preconditioning.
Cost and session shape decisions. Expect per session pricing roughly in these real clinic ranges: non ablative fractional around $600 to $2,000, ablative CO2 commonly $2,000 to $5,000, and picosecond treatments varying by indication from roughly $500 to $2,000. Non ablative courses often need multiple sessions; a single ablative session can be transformative but is heavier on logistics.
Concrete example: A 44 year old mom with sunspots concentrated on cheekbones and a tight afternoon schedule chose two picosecond pigment sessions spaced six weeks apart. The clinic performed a small test spot, pretreated with topical brighteners for four weeks, and planned single day downtime so she could schedule treatments on a weekend without extended time off.
Judgment most patients do not hear: choose the least destructive laser that will meet the objective. Many clinics push high intensity resurfacing because it looks more dramatic in before and afters. In practice, matching energy to the lesion type and skin tone, adding preconditioning for pigment, and planning realistic recovery yields the best combination of results and safety.
Next consideration: if your schedule or skin tone rules out aggressive resurfacing, ask your provider to map a staged plan combining a non ablative fractional course or picosecond pigment sessions with microneedling or superficial peels for maintenance rather than a single maximal procedure.
Mapping treatment to common mom concerns and skin types
Core principle: pick the treatment that addresses the layer of skin that’s driving your complaint — epidermal problems (surface pigment, dullness) need different tools than dermal problems (scarring, laxity). Matching mechanism to lesion depth reduces wasted treatments and prevents unnecessary risk.
How to prioritize when you only have limited recovery time
Practical tradeoff to accept: greater tissue disruption shortens the number of sessions but multiplies recovery, cost, and complication risk. For busy moms, a staged plan — incremental improvement with predictable recovery windows — usually delivers better real-world results than a single maximal procedure that requires long downtime or complex wound care.
- Surface pigment, dullness, uneven tone: start with a medical topical plan plus serial superficial chemical peels and antioxidant serums; escalate to picosecond pigment work only if test spots and preconditioning succeed.
- Enlarged pores and early texture changes: choose microneedling (mechanical) for pore collapse and repeated smoothing; add RF microneedling if you also need mild tightening.
- Acne scarring (rolling/boxcar): prioritize a series of microneedling sessions or RF microneedling; heavy ablative lasers can work but usually belong later in a staged pathway and under dermatologist supervision.
- Deep wrinkles and marked laxity: consider ablative fractional CO2 resurfacing when you can plan 7+ days of recovery and have surgical-level aftercare support; otherwise combine non-ablative lasers with RF or injectables for incremental improvement.
- Hormonal melasma: treat medically first — strict sunscreens and prescription topicals — then use conservative peels or pico lasers with test spots; avoid aggressive resurfacing until pigment stability is proven.
Sequencing matters more than single choices. Allow the inflammatory window to close before layering treatments: a reasonable rule-of-thumb is wait 2 to 4 weeks after a superficial peel before microneedling, 4 to 8 weeks between non-ablative laser sessions, and several months before doing ablative resurfacing after recent procedures. Overlapping inflammatory treatments increases the chance of prolonged redness and pigment shifts.
Cost-per-result insight: clinics sell single dramatic sessions because they look impressive in before-and-afters, but three to four conservative sessions (superficial peels or microneedling) can deliver comparable long-term satisfaction at similar or lower aggregated cost — and with fewer complications that disrupt mom life.
Concrete example: A 35-year-old mom with postpartum boxcar scarring and Fitzpatrick III skin had limited weekends off. Her provider paused topical retinoids, cleared active acne, then scheduled a series of three microneedling sessions spaced six weeks apart with a plan to add monthly superficial salicylic peels for tone maintenance. This approach avoided high-risk lasers, fit her childcare constraints, and allowed progressive improvement without a large single downtime block.
Match the problem to the tissue depth, plan treatment sequencing in advance, and budget for maintenance rather than chasing instant fixes.
Practical considerations for busy moms: scheduling, budget, and downtime management
Quick reality: planning a skin care treatment is logistics as much as medicine. Choose the treatment you can actually complete and maintain — not the flashiest option you see on Instagram.
Schedule like a project. Block actual recovery days on your calendar before you book: include travel time, a consult or test-spot visit, the treatment day, and the highest-symptom window when you will need help. Ask the clinic whether follow-ups can be remote; many practices will do a quick video check to avoid an extra trip.
Budget beyond the sticker price
Think total cost. The invoice from the clinic is only part of the bill. Add preconditioning topicals, a recovery kit, childcare or paid time off, possible repeat sessions, and sunscreen replacements. Watch for consult fees that are non refundable and for package deals that look cheaper per session but lock you into a device or protocol you might not want after a test spot.
| Hidden expense | Why it matters |
|---|---|
| Childcare during peak recovery | You may need day help on the worst symptom days even if you can return to work sooner |
| Aftercare supplies | Barrier ointments, mineral sunscreen, and prescribed topicals add up and are essential for results |
| Time cost for multiple visits | Several low-intensity sessions can equal one aggressive session in cost but spread over many weekends |
Concrete example: A 40-year-old working mom scheduled a medium-strength peel and insisted on doing the consult and a test spot two weeks before school break. She arranged a single day of remote work for the treatment day, organized a neighbor to pick up kids for three evenings when she expected heightened redness, and bought a clinician-approved recovery kit in advance. That small up-front plan prevented a cancelled treatment and avoided rushed aftercare when symptoms peaked.
- Downtime hacks that actually work: book treatments first thing Friday so the weekend covers early redness; ask the clinic for a written worst-case symptom day and align help for that day only; combine consult and test-spot on the same visit to cut trips.
- Time-saving compromise: choose a staged plan of repeat low-intensity treatments if you cannot guarantee a full week off — the cumulative effect is often comparable and less disruptive.
- Financial tip: request an itemized quote that separates device fees, consumables, and physician supervision so you can compare true value across clinics.
Small choices — scheduling a test spot, buying the right recovery ointment, lining up child care — do more to protect your results than upgrading to the most expensive device.
Final practical judgment: if your calendar, budget, or childcare is fragile, favor conservative, repeatable options you can maintain. Aggressive one-off procedures deliver big results when you can afford the logistics; otherwise, staged plans preserve results, reduce risk, and fit real mom life.
Choosing a provider and safety checklist
Key starting point: your results and safety depend far more on the operator and the clinic process than on the device brand on the wall. Verify credentials, case volume, and documentation before you let anyone touch your skin.
Critical verifications to request during a consult
- Operator clarity: who will perform the procedure – a board certified dermatologist or plastic surgeon, a physician assistant or nurse under direct physician supervision, or a non clinician. Ask for official credentials and a state license number to verify.
- Recent before and afters for your skin tone: request at least three examples that match your Fitzpatrick type and the specific concern you have. Images are worth more than marketing language.
- Device model and maintenance proof: write down the exact handpiece or model and ask when it was last serviced. Devices with poor maintenance are a genuine safety risk.
- Small trial area policy: for pigment prone or darker skin, the clinic should offer a conservative trial area and a documented follow up plan before any full face treatment.
- Infection and emergency protocols: confirm sterile disposables, single use needles or cartridges, and on site or on call physician backup for complications.
Practical limitation to accept: even board certification is not a guarantee of good outcomes. Procedural volume and examples on similar skin tones matter more than a title alone. Prefer a clinician who can show repeated success for cases like yours rather than one impressive but isolated result.
Red flags that should stop the booking
- Hard sell to upgrade intensity: pressure to choose a higher energy or deeper peel on the first visit without a trial or clear medical rationale.
- No written aftercare plan or emergency contact: clinics that skip documented instructions leave you exposed if things go sideways.
- Blanket guarantees or pricing that looks too low: drastically below-market prices for complex resurfacing often mean corners on training or device upkeep.
- No proof of test spots for lasers on darker tones: if pigment risk is present and the clinic declines a trial, walk away.
Concrete example: A 39 year old mom with Fitzpatrick V booked a laser consult. The clinic tech could not show any before and afters on similar skin and said a full face pico treatment would be fine. She postponed the procedure, asked for a dermatologist referral, and chose a clinic that performed a small test spot plus four weeks of topical preconditioning before any full treatment. The conservative route prevented a weeks long patchy hyperpigmentation episode and ultimately achieved steady improvement.
Demand evidence on people who look like you and a written plan for worst case scenarios; that is the single best predictor of a safe outcome.
Next consideration: if the consult leaves any doubt, ask for a dermatologist referral or a second opinion. Choosing the right provider is a risk management decision that protects both your time and your skin care treatment outcomes.
Aftercare and maintenance to protect results long term
Straightforward reality: the procedure stops being an investment the moment aftercare is treated like optional. Proper post-treatment routines and scheduled maintenance convert a short lived improvement into lasting change — and they are the single biggest determinant of whether you need repeat corrective work or not.
When to restart actives, makeup, sun exposure, and exercise
Retinoids and strong actives: resume gradually. For superficial peels or microneedling wait 7 to 10 days before reintroducing low strength retinol; for non-ablative lasers give yourself 2 to 3 weeks; for ablative CO2 plan several weeks and follow clinician clearance before restarting anything irritating. Always reintroduce at low frequency and monitor for pigment changes.
Makeup and physical activity: expect to avoid make-up for 24 to 72 hours after microneedling or superficial peels, longer for lasers until the barrier has sealed. Light activity that does not cause heavy sweating is fine after 48 hours for low intensity treatments; aggressive cardio that raises core temperature should wait until visible redness and weeping resolve.
Sun protection is non negotiable. Use a mineral sunscreen SPF 30+ daily and a wide brim hat after any resurfacing work. If pigment was your primary issue, plan sunscreen replacement every 2 months and keep an antioxidant serum in the morning routine. See our practical recovery product list at post-treatment skin care.
Maintenance rhythm and realistic frequencies
- Microneedling: touch-up every 6 to 12 months to preserve collagen gains rather than chase new damage.
- Non-ablative fractional lasers: plan annual or biennial sessions depending on photoaging and lifestyle.
- Superficial peels: quarterly for ongoing glow; monthly only if clinician approves and your skin tolerates it.
- Topical maintenance: daily SPF, nightly gentle retinoid (when cleared), and weekly hydrating masks to support barrier recovery.
Watch these red flags: increasing spotty pigment after the initial healing window, persistent open crusts beyond expected timelines, or new painful nodules. If you see any of those, document with photos and contact your clinic immediately rather than trying over the counter fixes — early medical input prevents long term PIH or scarring.
Real-life application: A mom who finished a three‑session microneedling series can follow this 3‑month plan: week 0–1 use barrier ointment and gentle hyaluronic serums only; weeks 2–4 add a vitamin C morning serum and strict mineral SPF; after week 4 introduce a low strength retinol every third night, increasing frequency as tolerated. Schedule a 6‑month review to decide on maintenance need and any touch-up.
Practical judgment: clinics that hand you a single sheet of generic instructions are not doing aftercare well. Ask for a tailored, itemized aftercare plan (specific products, exact restart days for actives, and a 24/7 contact for complications) before you leave the clinic — that plan protects both your results and your calendar.
Good aftercare is preventive medicine: sunscreen, staged reintroduction of actives, and scheduled maintenance beats emergency corrective procedures every time.
Frequently Asked Questions
Straight answer up front: use these FAQs to convert general advice into booking decisions you can actually act on this month. The right skin care treatment depends less on buzzwords and more on three practical things you can control: your recovery window, your baseline skin tone and history, and whether you can commit to maintenance.
Top practical questions moms ask
Can I schedule treatment around a big event? Yes, but plan using symptom peaks not marketing timelines. Book conservative options at least two weeks before anything photo‑sensitive like a wedding, and block 10 to 14 days for anything that might cause visible peeling. If you need near zero visibility, pick a superficial peel or a single light microneedling session rather than laser resurfacing.
Is it reasonable to combine procedures? Combining can be efficient but only when timed to avoid overlapping inflammation. A sensible approach is to complete a series of microneedling or peels first, assess results, then add a targeted laser for residual pigment or a single RF session for laxity. Rushing combinations is where complications start.
What if I have Fitzpatrick IV to VI skin? Favor low‑injury, staged plans and insist on a documented test spot. Microneedling and gentle serial peels with preconditioning usually reduce pigment risk compared with aggressive ablative lasers. If a clinic pushes immediate high‑energy resurfacing without test spots, walk away.
Does cost predict quality? Not reliably. Higher price can mean physician oversight or a premium device, but bargain pricing often reflects compromises in disposable use, device maintenance, or staff experience. Ask for an itemized estimate that separates supervision, device fees, and consumables so you can compare clinics apples to apples.
How do I vet before and after photos? Look for consistent lighting and timestamps, and request examples from patients with a skin tone similar to yours. If a clinic only shows dramatic results on much lighter skin or refuses to show dated series, that is a red flag.
Concrete example: A 33 year old mom with stubborn melasma and a two week window before a beach trip chose to postpone a laser and instead did a supervised superficial peel plus a prescription topical regimen. The clinician performed a one square inch test spot, documented two week follow up, and scheduled the full plan after results stabilized. This avoided a visible rebound pigmentation episode that would have ruined vacation photos and required months of extra treatment.
Practical tradeoff to accept: faster fixes increase both visible downtime and the odds of an unpredictable pigment response. If you cannot tolerate a worst case week of visible healing, choose staged, lower intensity treatments that accumulate results without the calendar risk.
If anything in the consult feels rushed, unclear, or missing proof on people who look like you, pause. A few extra weeks of planning prevents months of corrective work.


One thought on “Which Skin Care Treatment Is Right for You? A Mom’s Guide to Peels, Microneedling, and Lasers”
Comments are closed.